
Rapid PoC, With Vi IoT Sim Card
This article is a high-level overview of using Industrial Grade Vi™ IoT Sim Card to execute industrial/prototype-to-production PoCs rapidly.
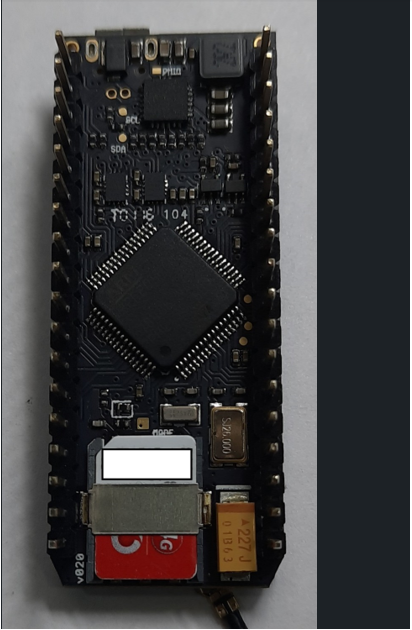
Particle Electron, an out-of-the-box readily available hardware with a cloud bundle environment and Thingspeak open-source data visualization tool, can rapidly transform your ideas into a product using Vi Enterprise-grade IoT sim cards, meticulously crafted connectivity solution specifically for your organizational strategic objectives.
Hardware components:
- Particle Electron - 1
- DHT22 Temperature Sensor Module -1
Software apps and online services:
- ThingSpeak API for data visualization.
The setup:
Now connect the sensor module DAT pin to D1, Vcc to 3.3v, and Gnd to Gnd of Particle Electron.
Let’s go to particle.io setup, and in the Electron section, click on “Setup my Electron.”
https://kradminasset.s3.ap-south-1.amazonaws.com/ExpertViews/Brijesh+.jpg
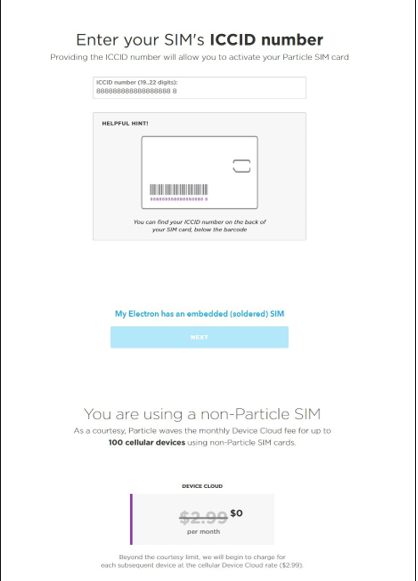
To successfully connect to the Device Cloud with a non-Particle SIM, you need to flash your device with special firmware.

The Electron indicates its status with the color LED. At first, it will blink green while connecting to the cell tower. After a few minutes, it will breathe cyan.
Electron breathing cyan means it’s connected to the internet
The Visualization:
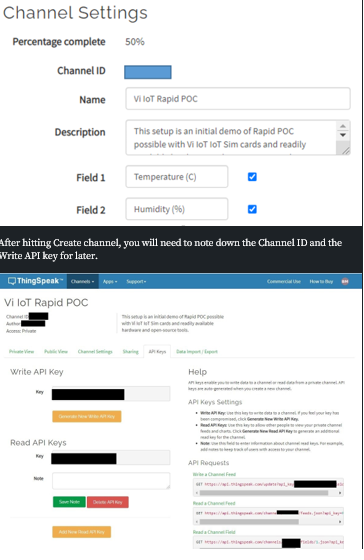
We will use ThingSpeak to visualize the temperature and humidity.
Create an account at thingspeak.com and create a channel called “Vi IoT Rapid PoC” with 2 Fields called “Temperature” and “Humidity.”
Let’s now move to write code for the Electron and to flash that code into the Electron.
After clicking through the Electron setup, you’ll end up in the online integrated development environment (IDE), where you can program the Electron.
For this project, we will use an existing library to talk to the temperature sensor and send data to the Thingspeak portal for visualization.
After naming your app and hitting “Save” (the folder icon), click the bookmark icon on the left to open the library tab.
Search for the “Adafruit_DHT_Particle” library and click “Include in-app.”
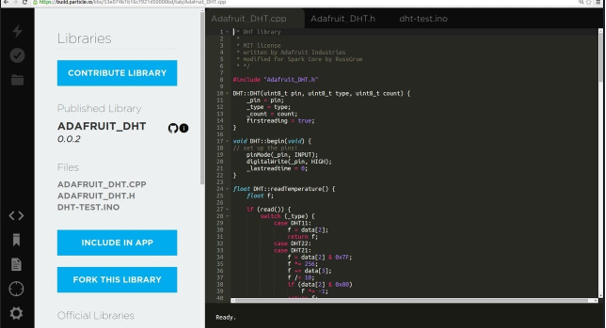
Do the same for the “ThingSpeak” library, the one written by the ThingSpeak development team.
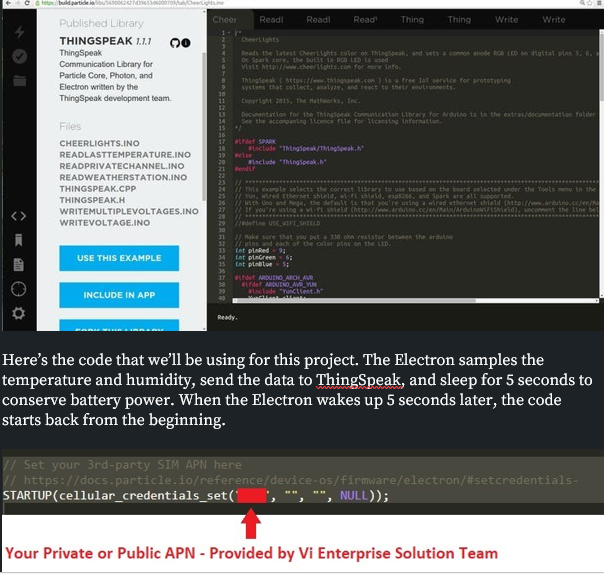
Here’s the code that we’ll be using for this project. The Electron samples the temperature and humidity, send the data to ThingSpeak, and sleep for 5 seconds to conserve battery power. When the Electron wakes up 5 seconds later, the code starts back from the beginning.
// This #include statement was automatically added by the Particle IDE.
#include <ThingSpeak.h>
// This #include statement was automatically added by the Particle IDE.
#include <Adafruit_DHT_Particle.h>
// This #include statement was automatically added by the Particle IDE.
#include <Adafruit_DHT_Particle.h>
#include "Particle.h"
// Set your 3rd-party SIM APN here
// https://docs.particle.io/reference/device-os/firmware/electron/#setcredentials-
STARTUP(cellular_credentials_set("********", "", "", NULL));
// This example assumes the sensor to be plugged into CONN2
#define DHTPIN D1 // what pin we're connected to
// Here we define the type of sensor used
#define DHTTYPE DHT22 // DHT11 or DHT22
DHT dht(DHTPIN, DHTTYPE);
/* Thingspeak */
TCPClient client;
unsigned long myChannelNumber = ***********;
const char * myWriteAPIKey = "****************";
void setup() {
// We open up a serial port to monitor the sensor values
Serial.begin(9600);
Serial.println("DHT22 test!");
dht.begin();
ThingSpeak.begin(client);
}
void loop() {
// Wait a few seconds between measurements.
delay(5000);
// Reading temperature or humidity takes about 250 milliseconds!
// Sensor readings may also be up to 2 seconds
float h = dht.getHumidity();
// Read temperature as Celsius
float t = dht.getTempCelcius();
// Read temperature as Farenheit
float f = dht.getTempFarenheit();
// Check if any reads failed and exit early (to try again).
if (isnan(h) || isnan(t) || isnan(f)) {
Serial.println("Failed to read from Grove DHT sensor!");
return;
}
ThingSpeak.setField(1, (float)t);
ThingSpeak.setField(2, (float)h);
// Write the fields that you've set all at once.
ThingSpeak.writeFields(myChannelNumber, myWriteAPIKey);
// Give time for the message to reach ThingSpeak
delay(5000);
// Print the data over serial
Serial.print("Humid: ");
Serial.print(h);
Serial.print("% - ");
Serial.print("Temp: ");
Serial.print(t);
Serial.print("*F ");
Serial.println(Time.timeStr());
// Publish data to the Particle cloud.
// Remember that you'll consume data every time you publish to the cloud.
Particle.publish("temp", String (t));
Particle.publish("humi", String (h));
}
Make sure to put your ThingSpeak channel number, Vi IoT Sim Card APN, and write the API key from before into your copy of the code.
Let’s hit the lightning bolt icon located at the top-left of the web IDE and flash the program into the Electron! You will get a warning that flashing over the air (OTA) uses a bit of data. At this point, it’s OK to say “Flash OTA anyway.” The Electron will flash purple a few times and restart.
You should now see that the Electron goes to sleep after 6 seconds and your first data point appear in ThingSpeak.
After some time, you’ll be able to see a nice graph of the temperature and humidity.
Comments
No comments yet. Be the first to comment!